
At the beginning there is an idea.
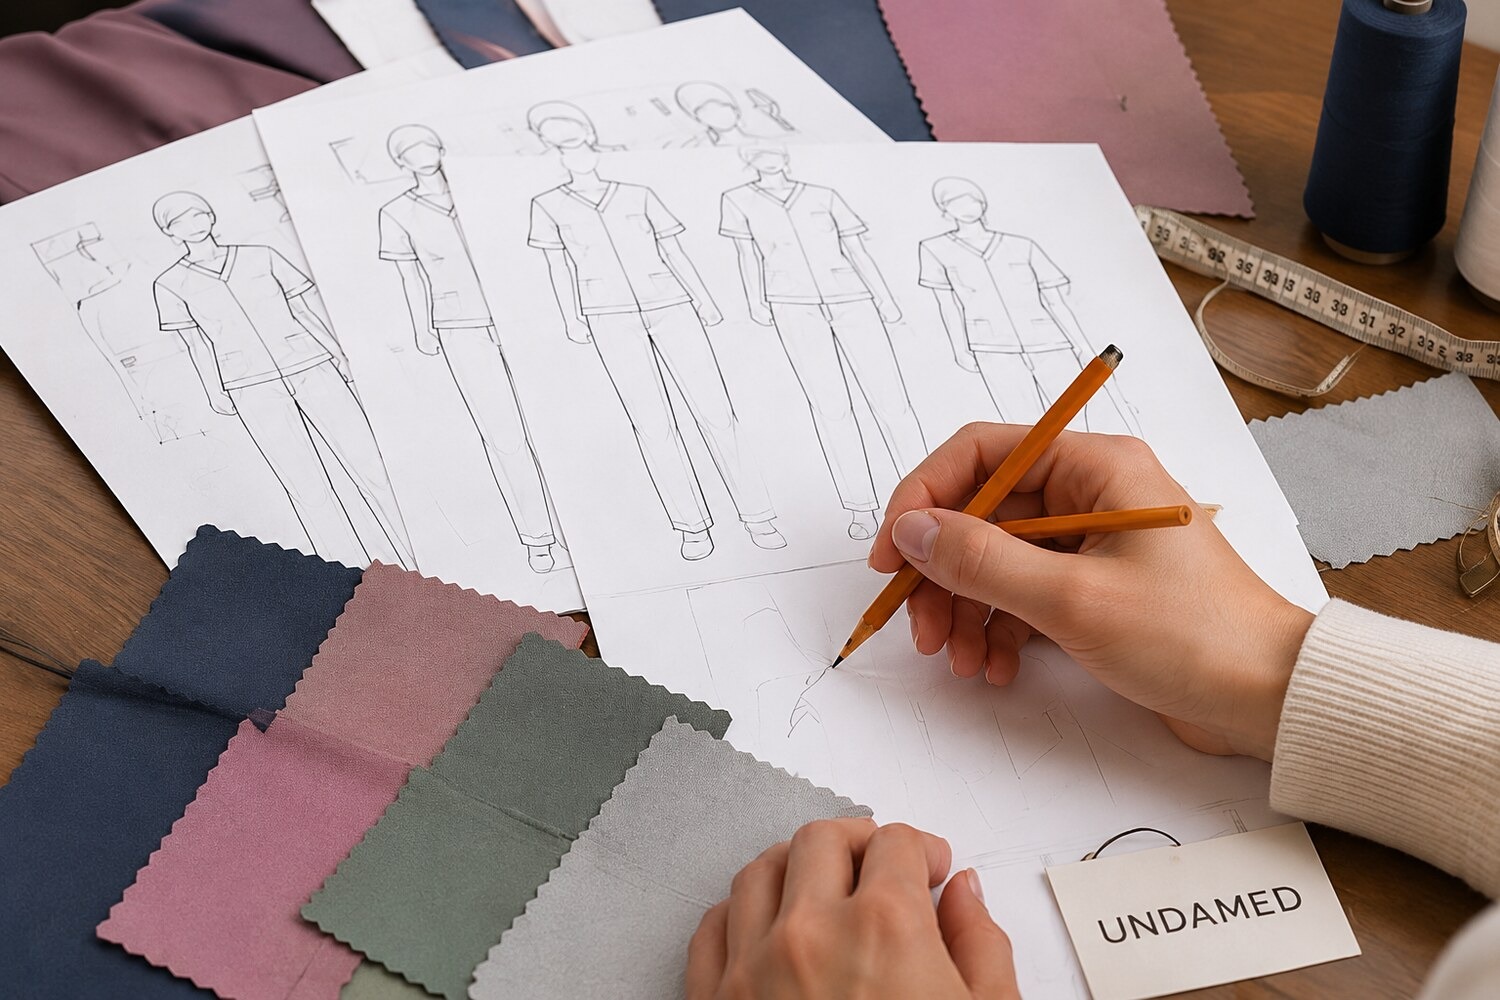
A sheet of paper, a pencil, an eraser and lines from which the outline of a top or a pair of trousers begins to emerge. We change the shoulder line, adjust the length and move a pocket. Sometimes we return to an earlier sketch because, while working, we decide that the next version does not actually look better.
On paper we can already see the proportions and character of the garment. We still do not know how it will behave on a person. That becomes clear later — during the first fittings.
We translate the sketch into a garment pattern. On that basis we prepare the pattern pieces, print them, cut the individual elements from fabric and sew the first prototype. Even during sewing, the first notes appear: we mark areas we want to inspect during the fitting or that may need correction.
And suddenly an idea that only recently consisted of a few intersecting lines becomes something tangible.
We put the prototype on and start moving. We sit down. We squat. We raise our arms. We bend. We put a phone, pen, small notebook or earphones into the pockets. We check whether everything fits, whether anything falls out and whether it is easy to reach.
Now we can see things that were invisible both in the sketch and on the computer screen.
This is what designing UNDAMED scrubs looks like.
How are UNDAMED scrubs made — in brief?
We start with a sketch and garment pattern construction. At the same time, we think about the fabric and colours in which the model should be made. We then sew a prototype in the target fabric, fit it in motion, make corrections, wear it, wash it and iron it. Once the model is approved, we prepare it for production, grade the pattern into sizes, cut, sew, press and inspect the finished garments.
In practice, the process looks like this:
- we sketch the model;
- we prepare the garment pattern;
- we establish proportions and construction ease;
- we select the fabric and work on the colour palette;
- we sew a prototype in the target fabric;
- we fit it and test it in motion;
- we return to the pattern and make corrections;
- we wear, wash and iron the next version;
- when we are satisfied with the result, we approve the model;
- we prepare the pattern for production and grade it into sizes;
- we cut and sew;
- we press and inspect the finished product.
The first prototype exists to show us how our idea looks and works in reality — and what still needs to be changed or improved.
Table of contents
- Everything starts with a sketch
- The sketch becomes a pattern
- What is construction ease?
- What about pockets? Pockets have to be designed too
- Fabric and colour are part of the design
- Choosing the colour palette
- Why do we sew the final prototype in the target fabric?
- The first prototype and a fitting in motion
- We return to the pattern
- We wear, wash and iron it
- When is the model ready?
- From an approved prototype to a finished product
- What if the standard size does not fit?
- FAQ
Everything starts with a sketch
We still draw our first ideas by hand.
On paper we look for the proportions of the whole model: the length of the top, shoulder line, trouser-leg width, neckline shape, seam lines and the position, shape and size of pockets.
A sketch is not yet a technical design. It is the moment when the idea reaches paper for the first time. We can quickly move, shorten, widen or completely rethink an element.
From the first sketches, we think about who will wear the garment and how that person will move in it. We also think about the fabric from which the model will be made.
At the fabric-selection stage we sometimes sew the same prototype in two different fabrics to see how the same pattern drapes and works in each material.
With a top, we are interested not only in the neckline or shoulder line. We ask what will happen when the wearer raises their arms.
Even with a short sleeve, we make several separate decisions: its length, finishing and the construction of the connection between the sleeve and the body of the top.
When designing trousers, we look at leg width but also at whether the wearer can sit, bend or squat freely.
We do not design medical clothing simply to look good in front of a mirror.
A physiotherapist kneels and works in a squat. A dentist leans over a patient. A nurse walks, reaches and changes position. A cosmetologist performs precise hand movements for many hours.
We take that into account before the first prototype is made.
The sketch becomes a pattern
When the concept is ready, it has to be translated into garment pattern construction.
This is where the general lines of the sketch end and specific measurements begin. We define, among other things, the armhole, rise length, trouser-leg width, seam lines, pocket position and the proportions of individual parts of the garment.
Body measurements are one of the starting points in clothing design. ISO 8559-1 describes anthropometric measurements used to create dimensional profiles and design garments, while the Polish CIOP-PIB Atlas of Human Measures provides anthropometric data intended, among other uses, for design and ergonomic assessment. [1] [2]
Body measurements alone still do not tell us what the finished garment should measure.
What is construction ease?
A garment is not a copy of the body's measurements.
Between the body and the finished product we need properly designed space — construction ease.
The amount depends on the cut, the area of the body and the properties of the fabric. A fitted top requires different assumptions from a looser model. A soft fabric behaves differently from a stiffer one, just as a fabric with elastane behaves differently from one without it.
If there is too little ease, the garment may pull when sitting, bending or raising the arms. If there is too much, the cut may lose its proportions.
Scrubs are not supposed to be simply “loose”. They need exactly as much room as the particular model and the movements for which it was designed require.
We discuss cut, fabrics, sizing and choosing a uniform in more detail in our complete guide to medical scrubs.
What about pockets? Pockets have to be designed too
“The top has three pockets” sounds like specific product information.
In practice, it says very little.
A pocket can be large but awkwardly positioned. It can be deep but have an opening that is too narrow. It can look good in a photograph and then pull the whole side of the garment down when a phone is placed inside.
That is why we do not look only at the number of pockets.
Their position, depth, width, method of construction and the behaviour of the garment when they are loaded all matter.
During fittings we put a phone into the pocket. It is a simple test, but it tells us a great deal.
We take the same approach to hidden pockets, compartments and places for an ID badge. A detail is functional only when it genuinely helps during use.
Fabric and colour are part of the design
You can prepare a good pattern and completely change its character by choosing the wrong fabric.
That is why we do not design the whole garment first and only at the end decide what to make it from.
We have a proven fabric used in UNDAMED designs: 60% polyester, 35% viscose and 5% elastane.
The fibre composition alone is not enough for us to make a decision.
We want to see the material as a finished garment.
How does it fall over the shoulder? What happens at the knees in a squat? How does it work while sitting? How does it look after several hours of wear? Does it press well? How does it look after washing?
That is why we assess fabric on a prototype, not only on a swatch lying on a table.
Choosing the colour palette
Colour is part of the design for us.
When designing a product, from the beginning we think about the colours in which it should exist.
The same cut can look completely different in deep navy, burgundy, sage or light blue.
Its character, perceived proportions and the way details are seen all change.
The fabric itself also matters. A shade viewed on a screen or on a small swatch does not always look identical over the larger surface of a finished garment, in motion and under different lighting.
We treat cut, fabric and colour as elements of one design and do not make those decisions independently.
This does not mean that every model has to be available in every UNDAMED colour. The colour should suit the specific product rather than simply increase the number of variants.
For teams and clinics: if you need sets in colours matched to your facility's identity, contact us. We will check fabric availability and the possibility of preparing the selected colour.
Read more in our guide to choosing scrub colours.
Why do we sew the final prototype in the target fabric?
At an earlier stage we may compare different materials. Once we select the fabric for a model, however, the prototype used for final fittings is made in that target material.
The same pattern can behave very differently depending on the fabric.
A soft fabric falls differently over the shoulder from a stiffer one. A more elastic material behaves differently at the knees and hips. Even the same pocket may sit differently.
That is why we want final fittings to take place in the material from which the model will actually be produced.
Otherwise we would be testing the construction under conditions that do not correspond to the final product.
The first prototype and a fitting in motion
When the pattern is ready and the fabric has been selected, we sew the first prototype.
At this point all the earlier decisions come together and the garment we designed becomes real.
Only now can we truly see how the proportions, neckline, pockets and length behave.
We fit it and start moving.
Squat
During a squat we focus primarily on the trousers.
Do they slide down at the back? Is there enough room in the thighs and hips? What happens to the waistband?
Trousers that look good on a standing body can behave very differently in motion.
Arms up
For a top, one of the simplest tests is raising the arms.
This shows how the fabric works around the armholes and shoulders and how high the bottom edge of the top rises.
That matters because work involves reaching, bending, changing position and performing movements that cannot be evaluated with the arms resting calmly at the sides.
Bend and twist
When bending forward, we look, among other things, at the neckline. Twisting the torso shows what happens across the back and shoulder area.
Sometimes only this kind of movement reveals tension that cannot be seen while standing in front of a mirror.
With one prototype, the top looked exactly as we wanted when it was first put on. Only when the person started raising their arms did we notice slight pulling across the back.
We returned to the pattern and corrected the armhole, widening it by just under one centimetre. That small change was enough for the top to behave in motion as we expected.
A phone in the pocket
An empty pocket usually looks good.
That is why we put a phone, small notebook or pen into it and check whether the items really fit, whether they are easy to reach and whether their weight changes the way the whole garment hangs.
During a single fitting it may seem like a small detail, but at work you reach into the same pocket many times. If it is too shallow, badly positioned or awkward, it quickly becomes irritating.
A study of nurses' uniforms by Stubbs and colleagues reported mobility restrictions connected with uniform construction, including at the hips, torso and shoulder girdle. It was not a study of UNDAMED products, but it illustrates why a fitting in motion provides more information than simply looking in a mirror. [3]
We return to the pattern
If something does not work during a fitting, we return to the pattern.
Sometimes it is the trouser-leg width, sometimes the armhole, garment length, pocket position or sleeve length.
A change does not have to be large to affect the behaviour of the whole garment.
After adjusting the pattern, we sew the next version and test it again.
We do not assume that every model has to be ready after a fixed number of prototypes. Some designs need fewer changes, others need more.
A good example is one of our pockets. It looked very good in the prototype. Only when we placed a phone in it during the fitting did we realise it would be more comfortable if we made it 1 cm deeper.
So we returned to the pattern, changed the pocket and tested it again.
That is why we test prototypes on ourselves first — so that we can catch details like these before approving a model.
We wear, wash and iron it
A fitting tells us a lot, but it is short. A finished uniform will later be worn for many hours, so some things only become visible over time.
We wear the prototype and observe how it behaves after several hours.
Then we wash it.
We look at the cut, seams, fabric surface and colour. We want to see the garment after an ordinary action that will be repeated many times in normal use.
We also iron it and check how the fabric responds to heat and steam.
It is during such everyday actions that you sometimes notice things a fabric swatch cannot reveal.
Read more in our guide to washing scrubs.
When is the model ready?
We do not have one test after which we can simply say:
“Done.”
We look at the garment as a whole.
Does it fit well? Can you move freely? Is the pocket functional and does it still look good when something is placed inside? What happens to the neckline when you bend? Do the trousers stay in place in a squat? Does the product still look as expected after washing?
If any of these elements needs changing, we go back to an earlier stage.
Only when we no longer feel the need to correct the model can it be approved for production.
For us, this is where premium medical clothing begins — with decisions made much earlier, often completely invisible in the finished product.
Good workwear should not remind you of its existence all day long.
From an approved prototype to a finished product
Approving the prototype does not end the process. The design then has to be prepared so that the same model can be sewn repeatedly in successive sizes.
We work with digital garment patterns. Once the model pattern is approved, we prepare it for production and grade it into individual sizes. On that basis we create cutting layouts, print them on a plotter and use them during cutting.
Cutting is not simply about cutting the correct shape from the fabric. We also inspect the material for defects. If we find a defect where a garment piece would be cut, we do not use that fragment in the finished product. The piece is cut again from a correct area of fabric.
The cut pieces then go to sewing.
Inspection does not appear only at the end. During successive sewing stages we also check the fabric and the execution of individual elements.
Garments are pressed during production as well. Intermediate pressing helps position individual elements and seams correctly, and after sewing the product goes through final pressing. At that point we can again inspect both seams and the fabric surface closely.
The final inspection takes place on the completed garment. Before packing, we assess the product as a whole — not a single detail or section of seam, but the finished top or trousers.
Only then is the garment ready to leave production.
Design and production take place in Poland. This keeps us close to the entire process: from the first sketch and pattern, through prototypes and corrections, to cutting, sewing and inspection of the finished piece.
What if the standard size does not fit?
A size chart is necessary, but it remains a simplified system.
Human bodies are more diverse.
One person may fit the standard hip measurement but need a longer trouser leg. Another may have the opposite proportions or need a longer sleeve.
That is why at UNDAMED we can prepare selected products to individual measurements, shorten or lengthen trousers or tops and adapt selected elements such as the type, number or size of pockets.
A person does not always have to fit the chart perfectly. We can adapt the garment to the person.
Sources
- International Organization for Standardization (ISO). ISO 8559-1:2017 — Size designation of clothes — Part 1: Anthropometric definitions for body measurement. https://www.iso.org/standard/61686.html
- Central Institute for Labour Protection — National Research Institute. Atlas of Human Measures. Data for design and ergonomic assessment. Warsaw 2023. https://atlas.ciop.pl/
- Stubbs D.A., Buckle P.W., Hudson M.P., Butler P.E., Rivers P.M. Nurses' uniform: an investigation of mobility. International Journal of Nursing Studies. 1985;22(3):217–229. DOI: 10.1016/0020-7489(85)90005-7. https://pubmed.ncbi.nlm.nih.gov/3850078/
- UNDAMED — the team's own experience. The description of the design, prototyping, fitting, correction and production process in this article is based on our many years of experience in garment design, pattern construction and clothing production in Poland and on our current work on UNDAMED products.
About the author
UNDAMED team
UNDAMED designs and develops medical clothing in Poland, drawing on experience gained since 2012 in garment design, pattern construction and clothing production.
We work from the first sketch and pattern construction through fabric and colour selection, prototypes, fittings and corrections.
We also test garments in motion — sitting, bending, raising the arms and squatting. We put a phone into the pockets and wear, wash and iron the prototypes.
Once a model is approved, we prepare the pattern for production, grade it into sizes, cut, sew, press and inspect the finished garment.
If something does not work as we expected, we return to an earlier stage.
That is exactly why a prototype is made.